Tutorial: PROGENy
This tutorial is designed to guide users through the use of PROGENy in FUNKI.
The first step is to upload your data, either a contrast experiment or multiple conditons. See transcriptutorial for more info on how to obtain normalized counts of differential analysis top table output (e.i. limma).
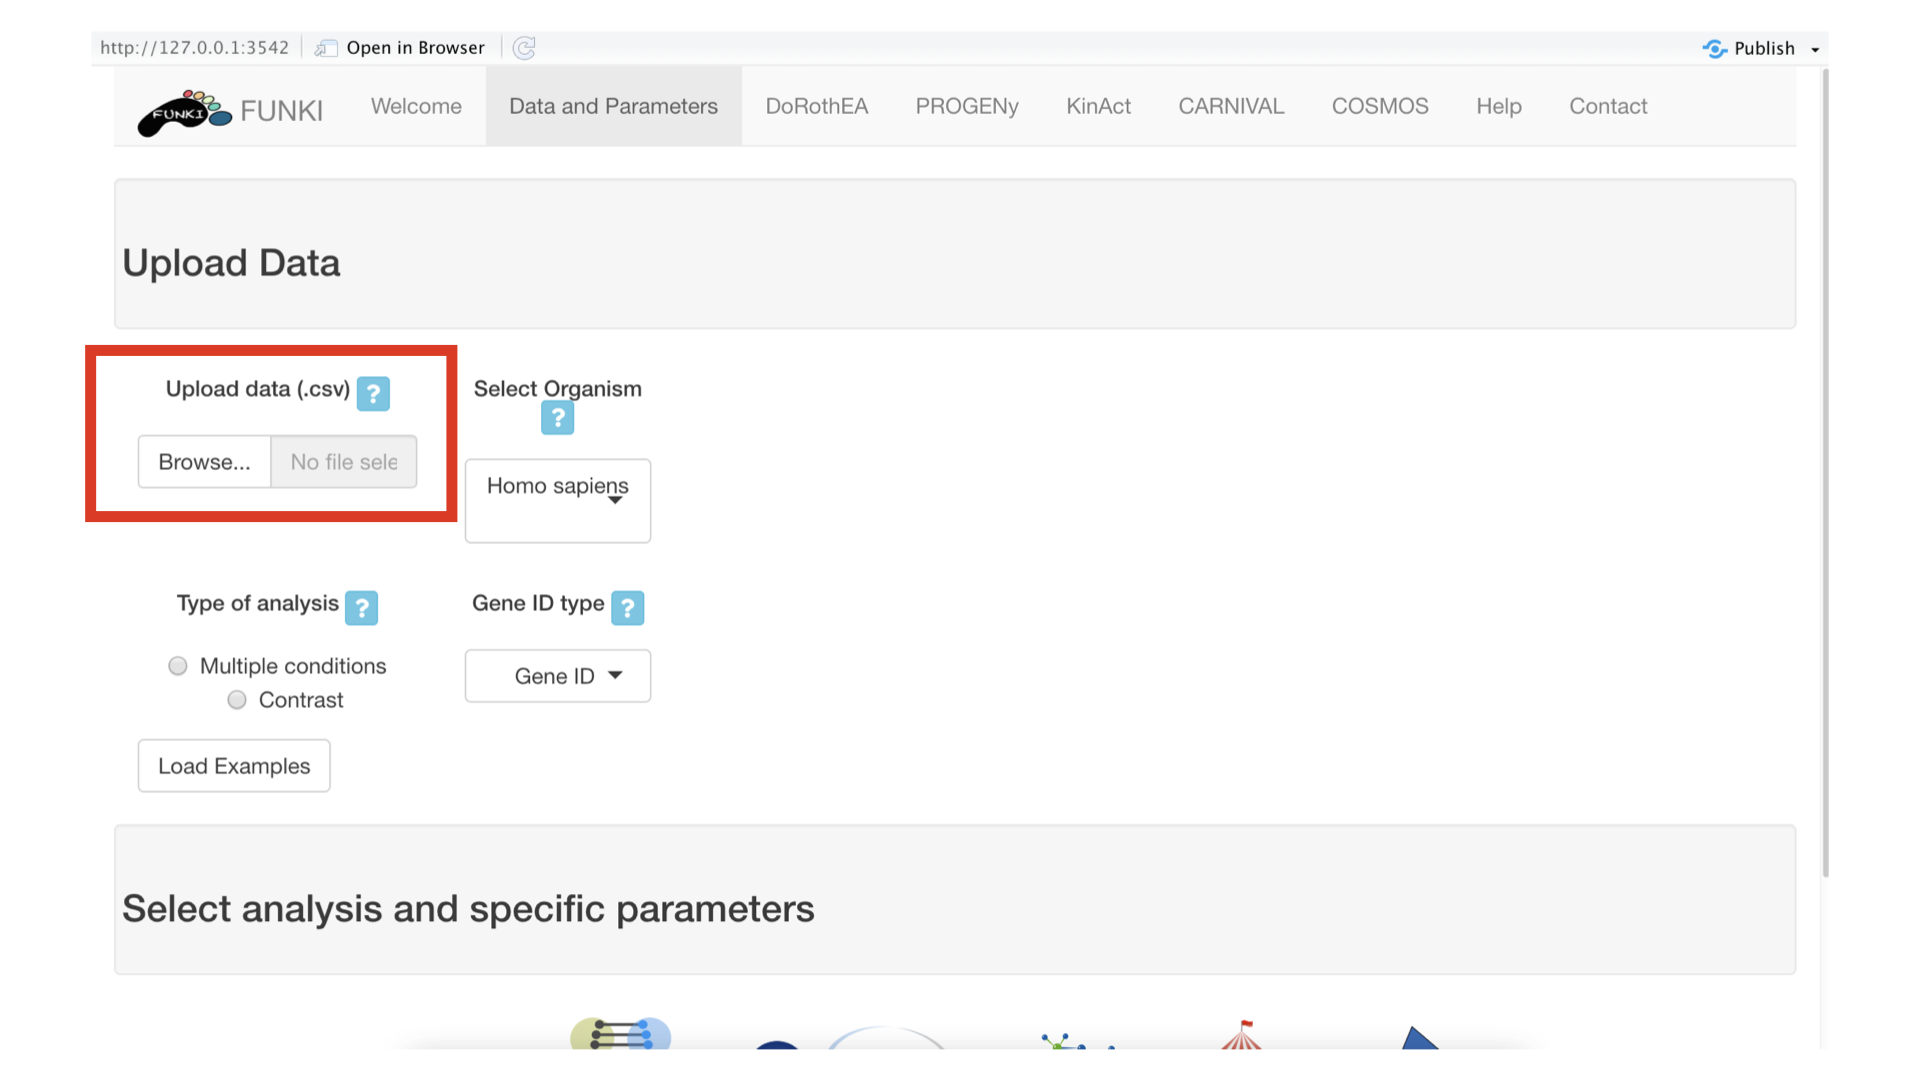
Once the RNA data has been properly uploaded, the table is displayed on the right.
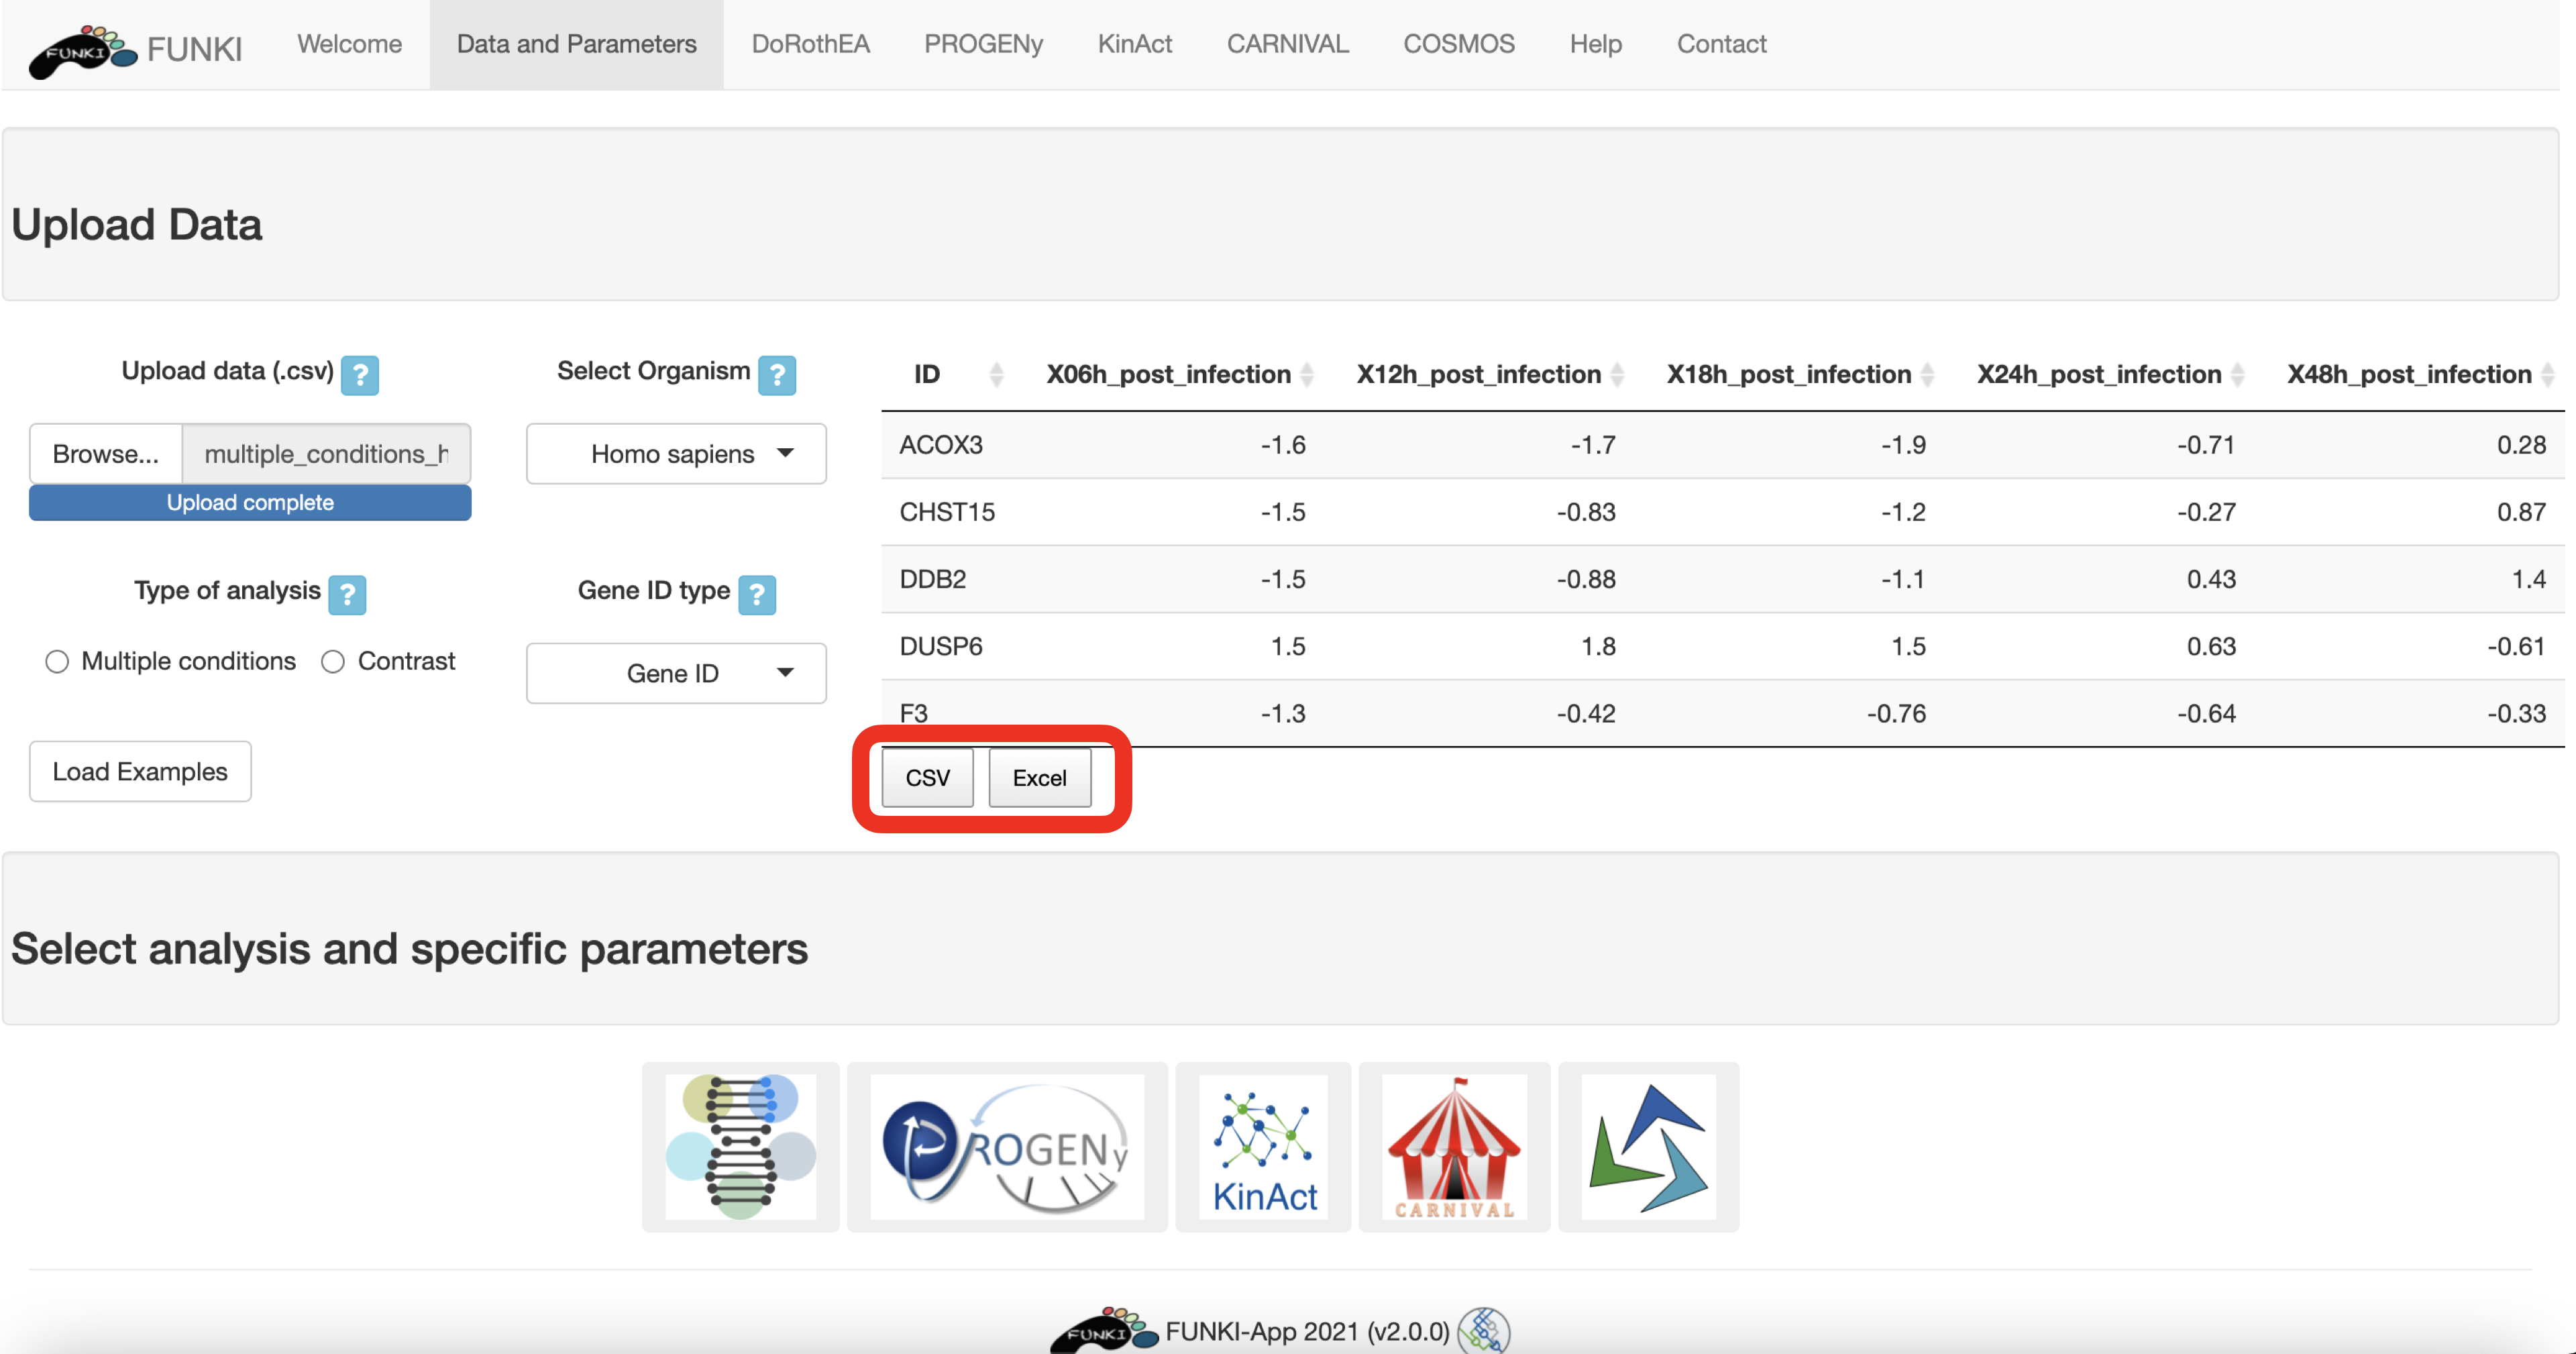
When it is a multiple conditions file, the ID column should include the gene ids for each of the samples (rest of the columns). If the file is a contrast experiment, it would contain at least the ID column and a column named “t” (for t-value), as a csv file. Remember to indicate the type of analysis.
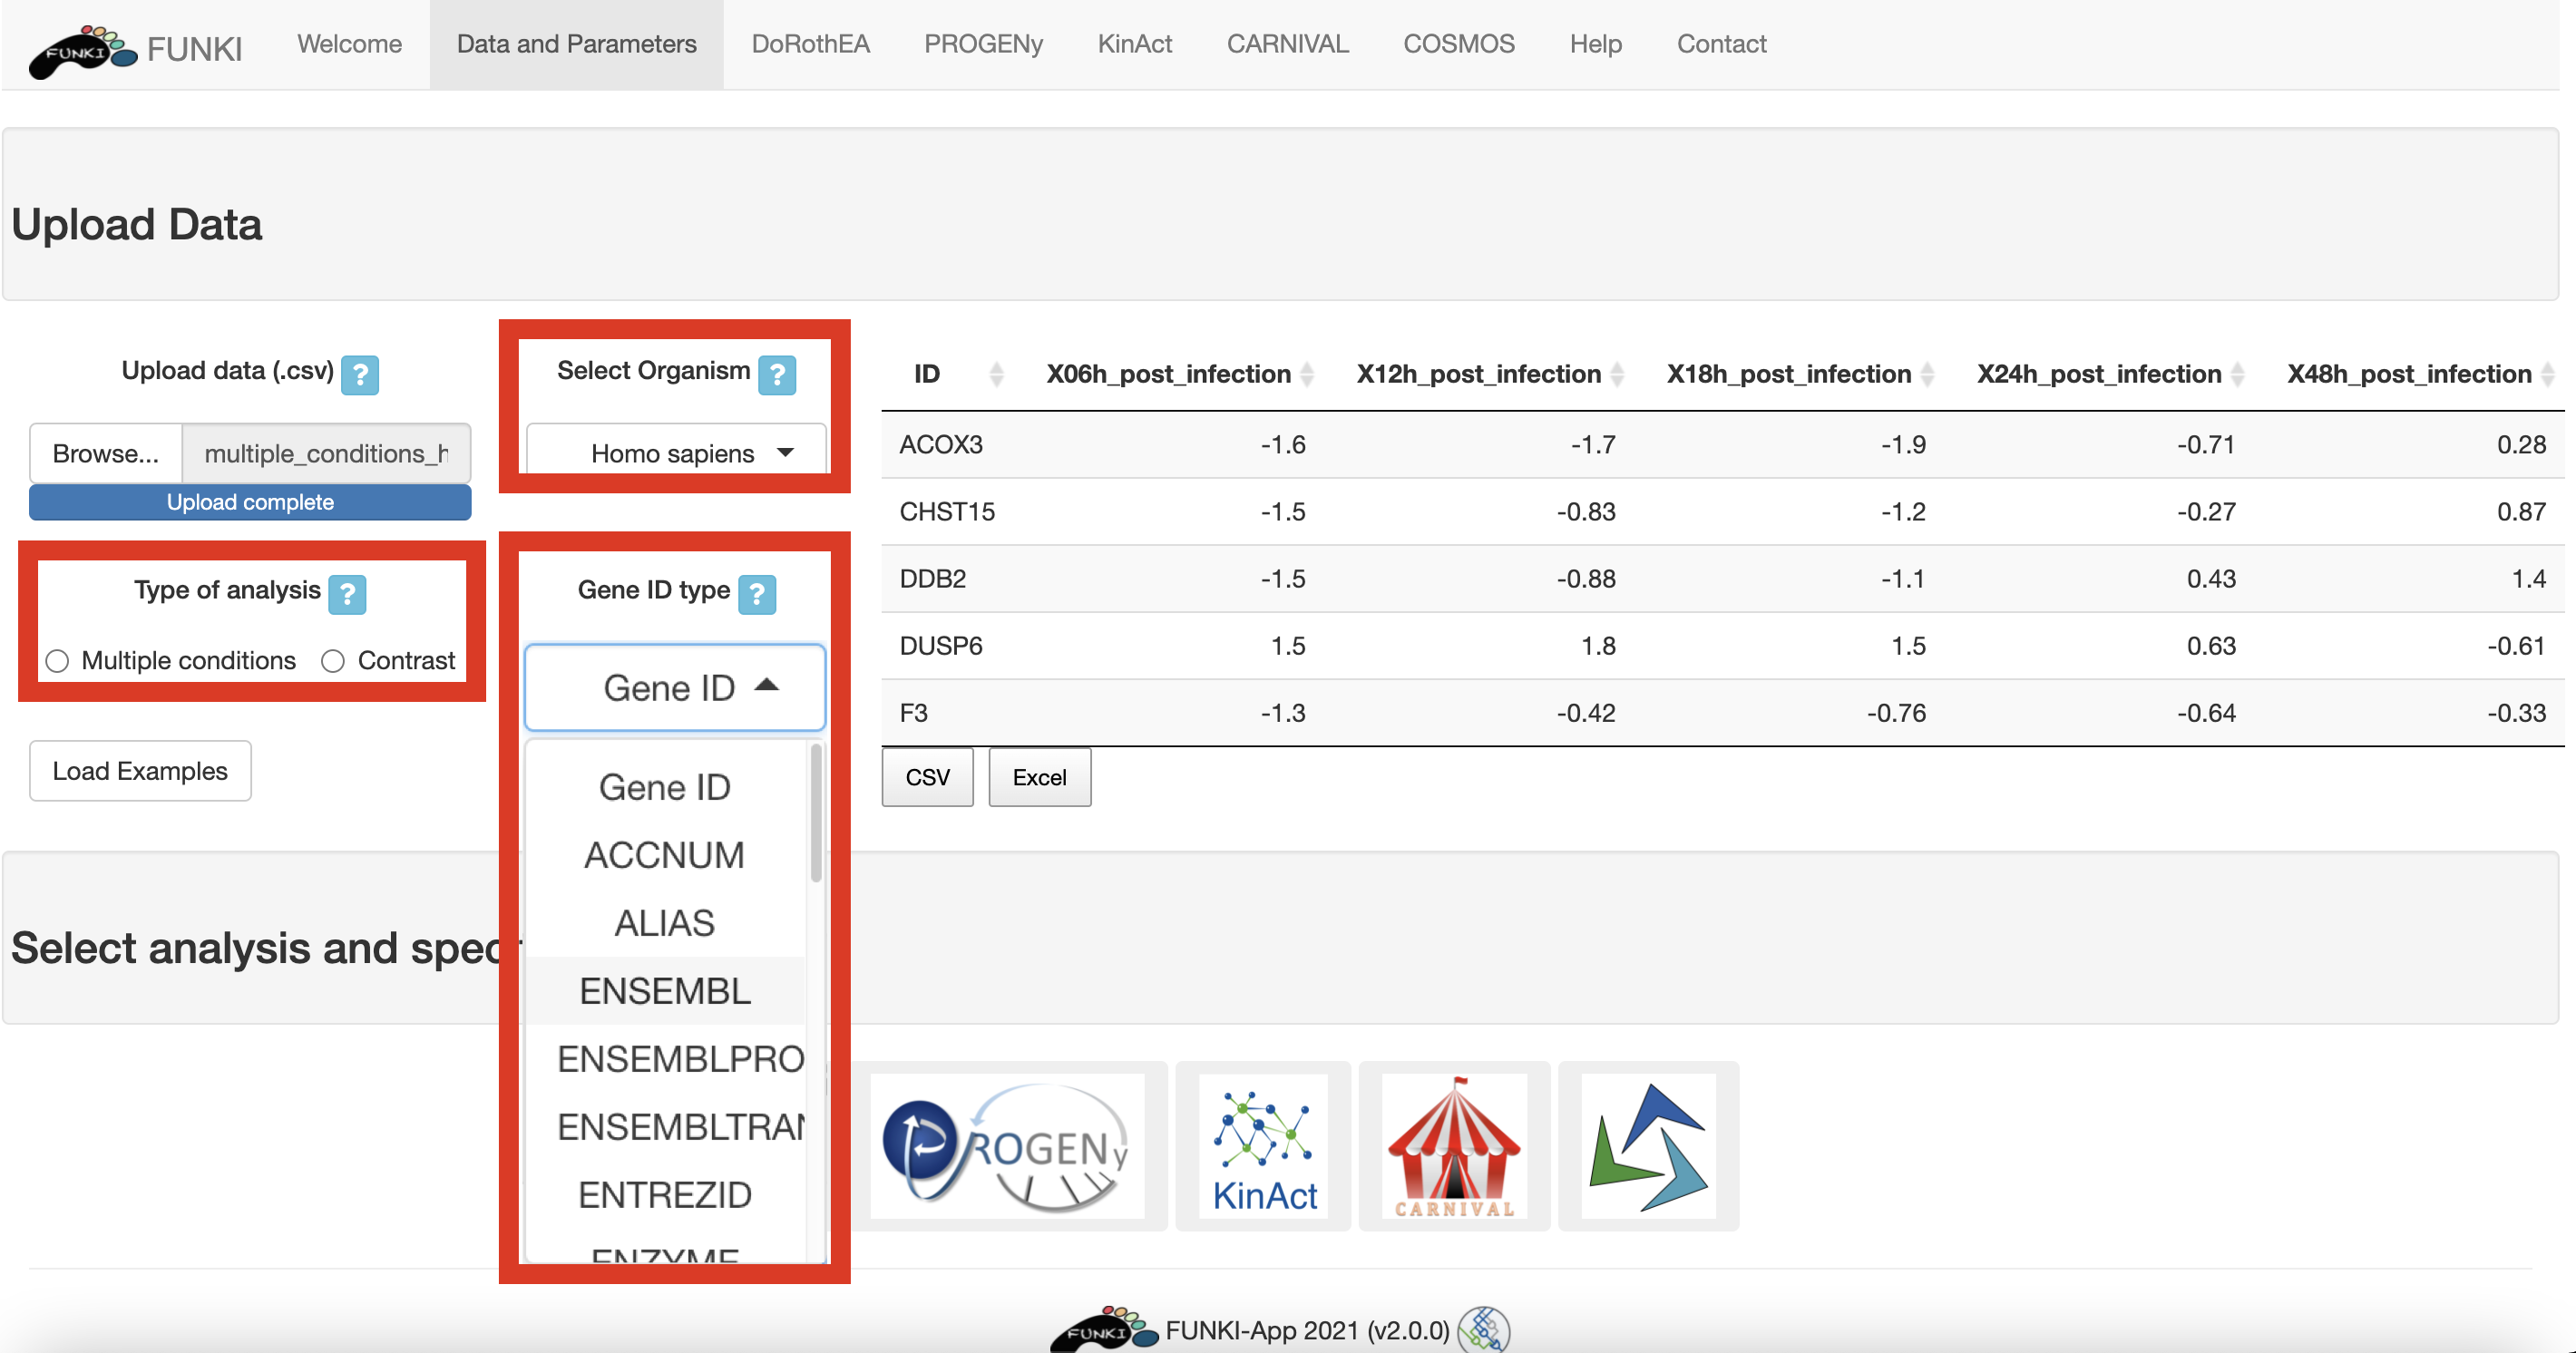
It is also mandatory to indicate the species, and the type of identifier used of the genes. The user can use the drop down list of the gene identifiers to indicate the ids of the file. We warmly recommend HGNC symbols.
Next, go at the bottom of the window and click on the PROGENy logo to display the specific parameters.
- Number of permutations: Progeny pathway scores are computed, and their significance assessed, using a gene sampling-based permutation strategy.
- Top genes for model matrix: The top n genes for generating the model matrix according to significance (p-value).
![]()
Once everything is set and ready, you can press the “Run PROGENy” button, which should take you to the results tab.
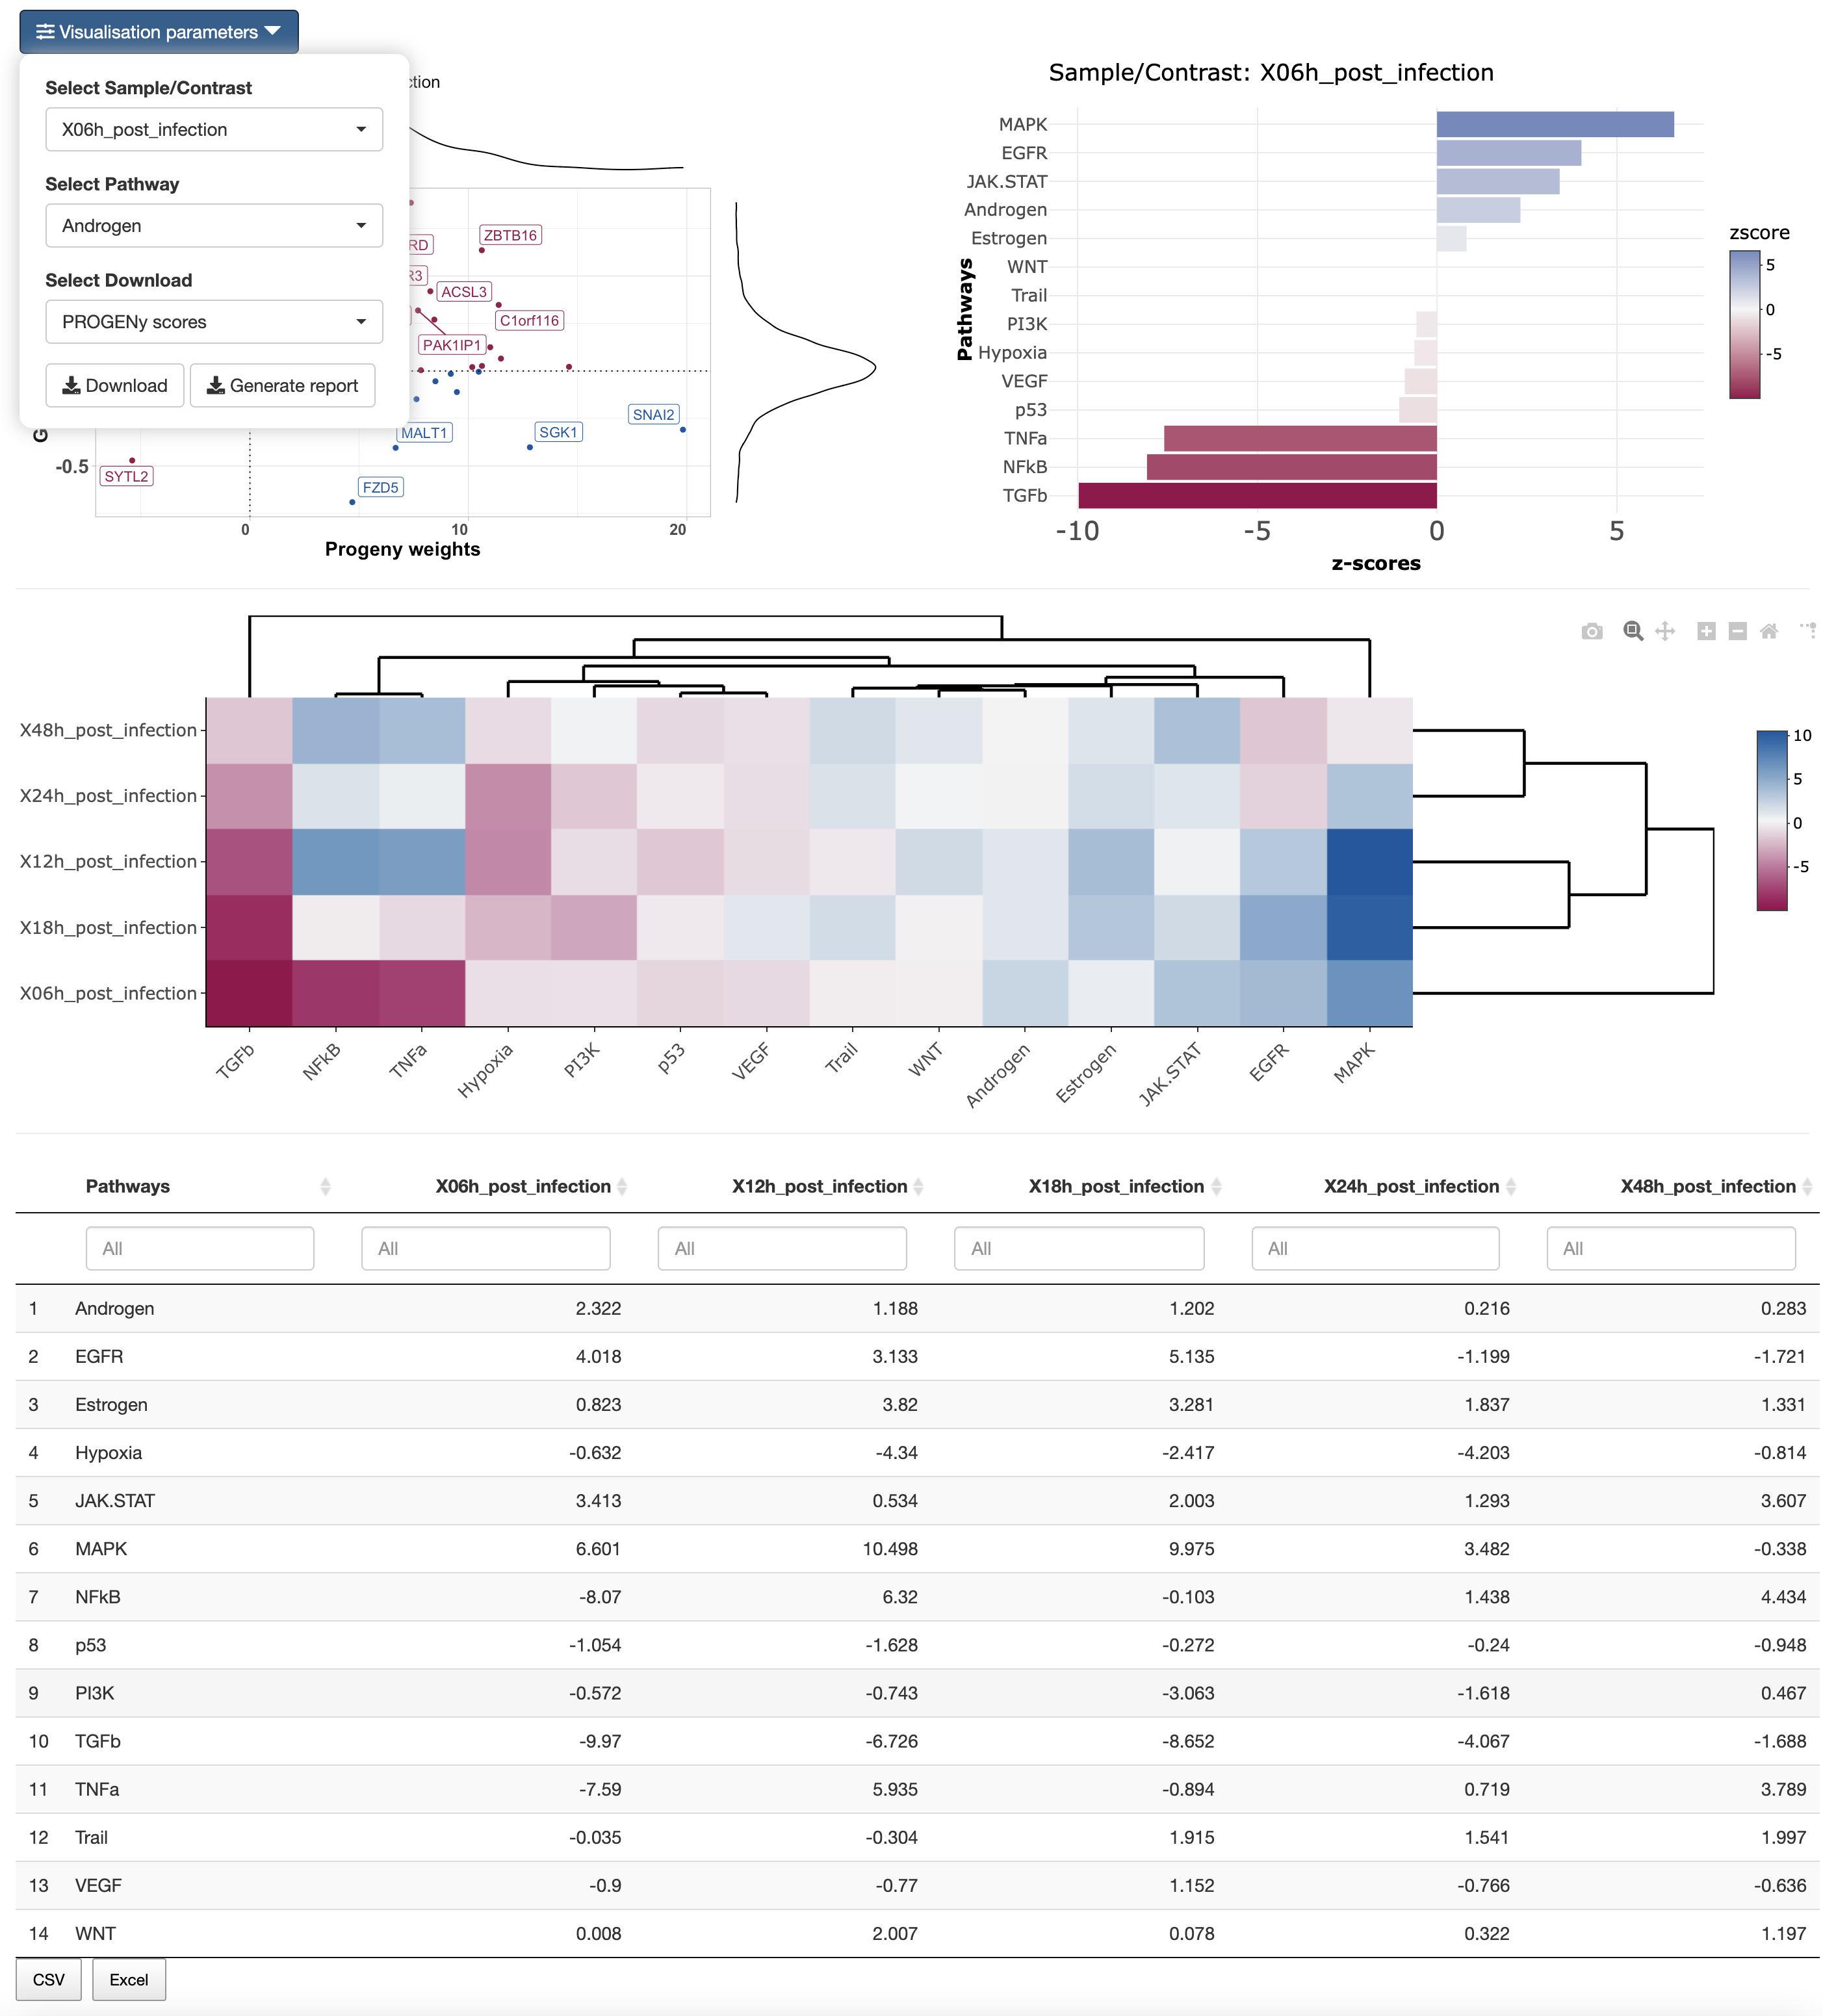
In the results tab, you can use the control widgets to browser around the results.
- Select Sample/Contrast: Select contrast/sample of interest.
- Select Pathway: Select pathway to show in the scatter plot.
To download the result, the user can either download each of the figues and the analysis by selecting the type of download and then click on the download button. The user can also download an integrated report with all the parameters, code and results of the analysis by clicking on Generate report.